
Step-by-step guide to adding another admin to your eOceans project.
When running a project in eOceans, it’s helpful to have multiple admins to share responsibilities such as updating the project, managing participants, and quality-checking data. Here’s how to add another admin to your project.
*NOTE: Adding an admin can only be done in the eOceans dashboard, it cannot be done in the mobile app.
Login to the dashboard:
Visit eOceans.app and login

Visit your Project
Go to “Teams
Then, “Owned Teams”
Then, find the project you want to add an admin to

Navigate to the ‘Users’ tab
Depending on your screen size and number of tabs, you may have to scroll to over to find ‘Users‘ tab

Invite the person you want to be an admin to your project
If the person is not already in your project, you’ll first need to invite them and they will need to accept the invitation.

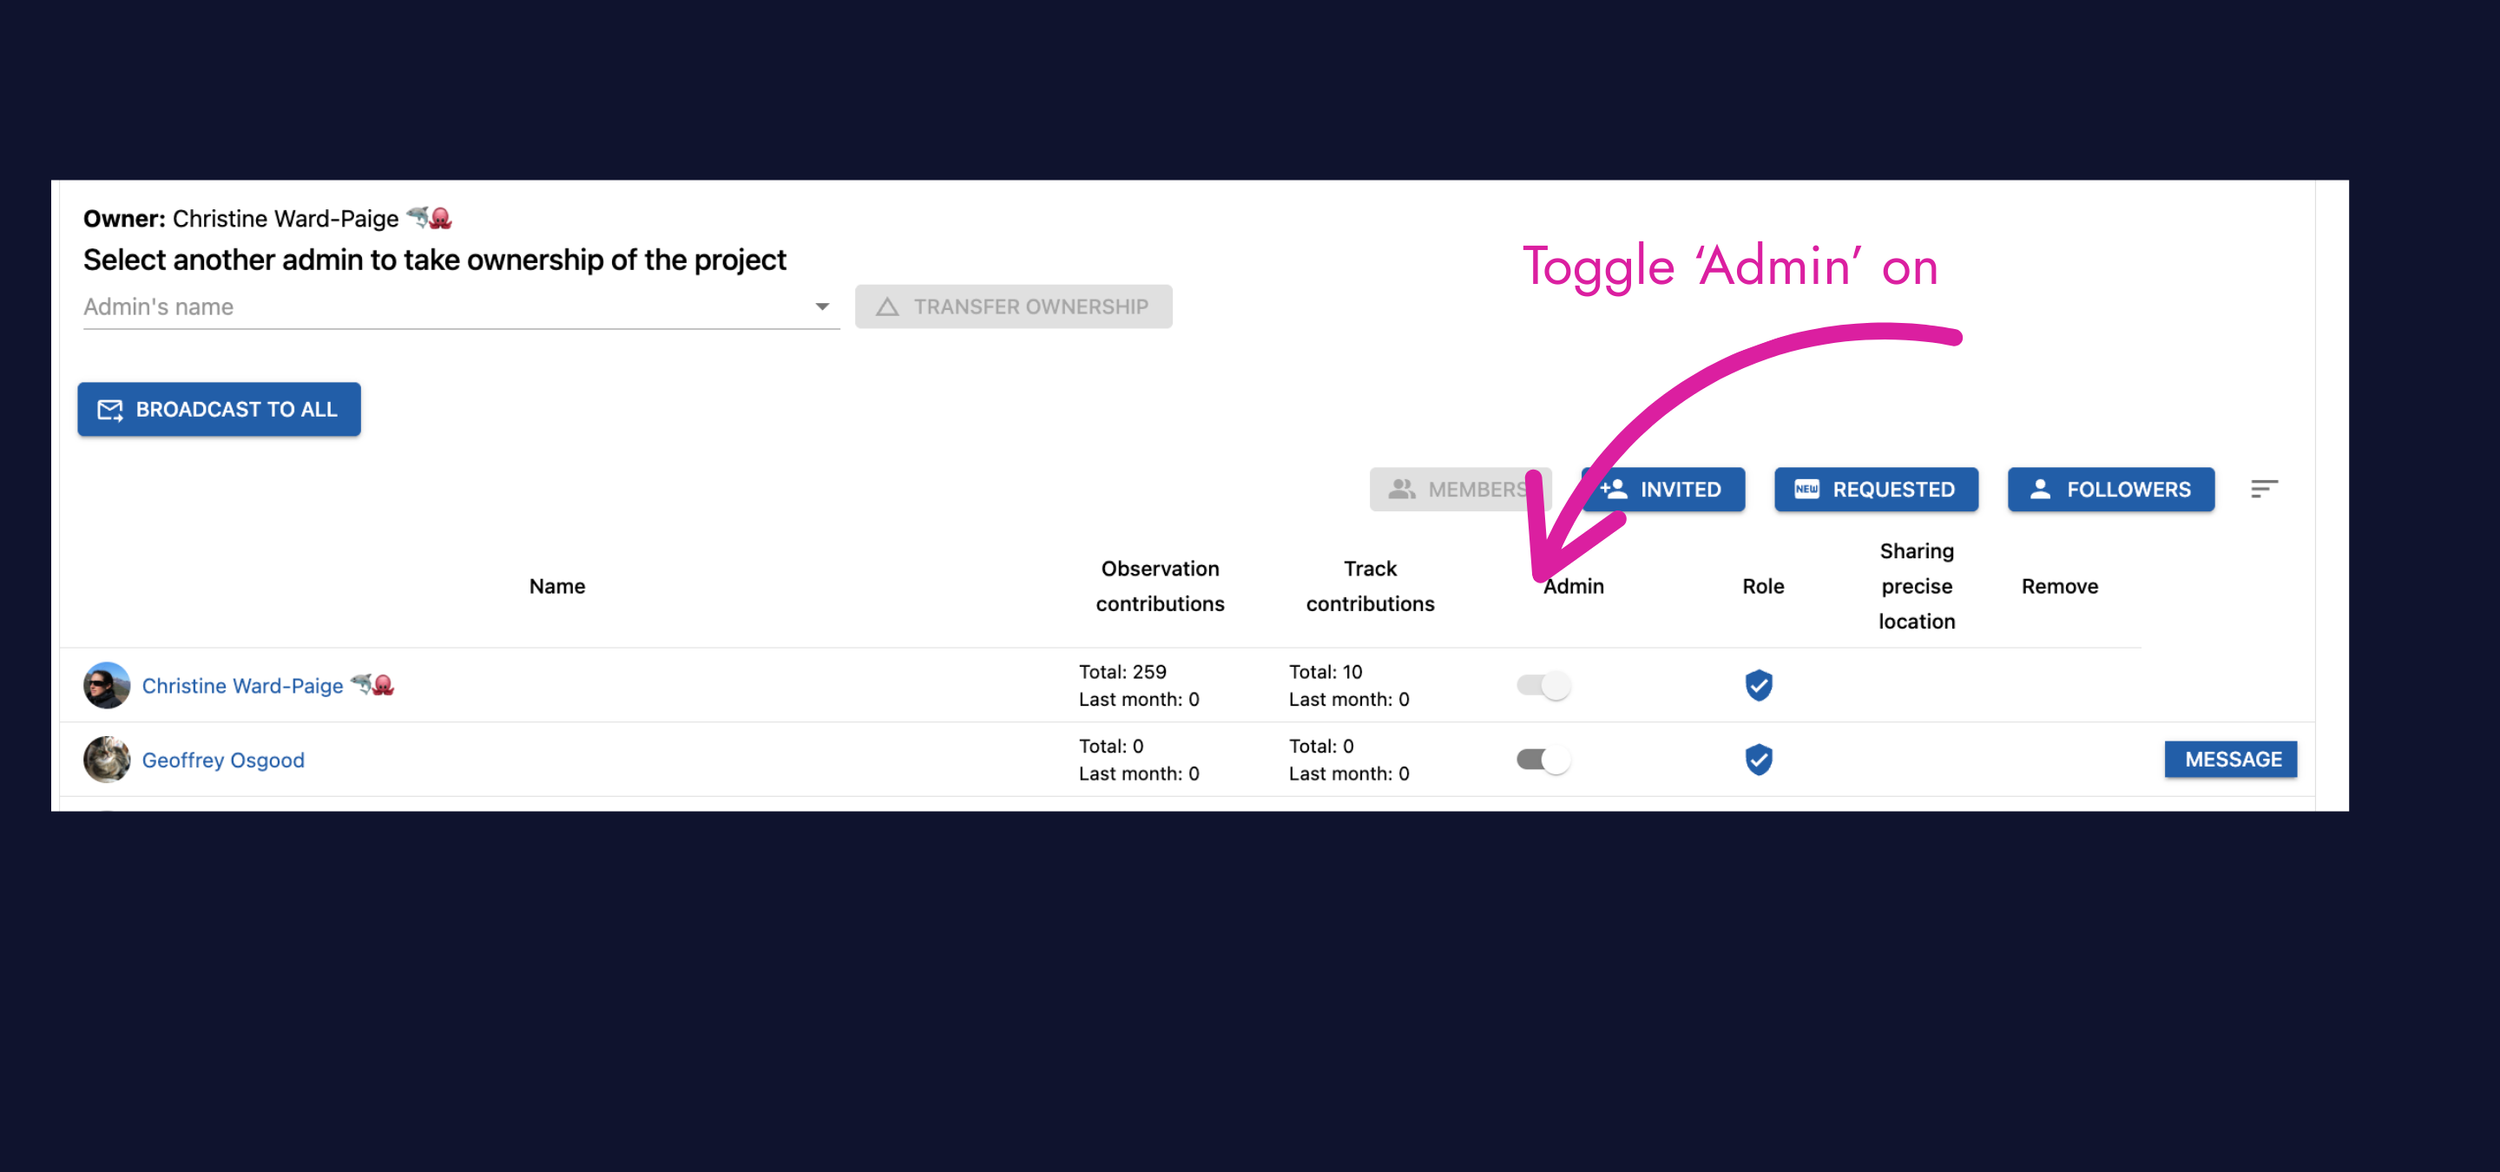
Add person as an admin
Once the person has been added to your team, you can toggle the switch to make that person an ‘Admin’
Once they confirm, they will have the authority to manage your project with you.
Having trouble? Our team is here to help.
Contact us or visit our how-to page for more information on using eOceans.