
For PRO members: Step-by-step guide to updating your personal site list.
If you have an eOceans PRO account with a site list for after-the-fact logging, then you can updated your own site list any time. This feature ensures your data are still geo-tagged, even if you can’t use the phone’s GPS and time stamp in real-time.
To update, you will need the new site list
—> Prepare a site list with the columns ‘name’, ‘latitude’, ‘longitude’ in the top row (Row A).
—> List the site names and coordinates below, with no blank cells.
—> **This list will replace the list that is already associated with your account.
—> **Double check your site list — drop the lat/long values into a mapping tool, like Google Maps, to ensure they are in the right place (no missed negative signs, for example).
Here’s an example — you will be uploading a .csv or .xlsx version to your profile.

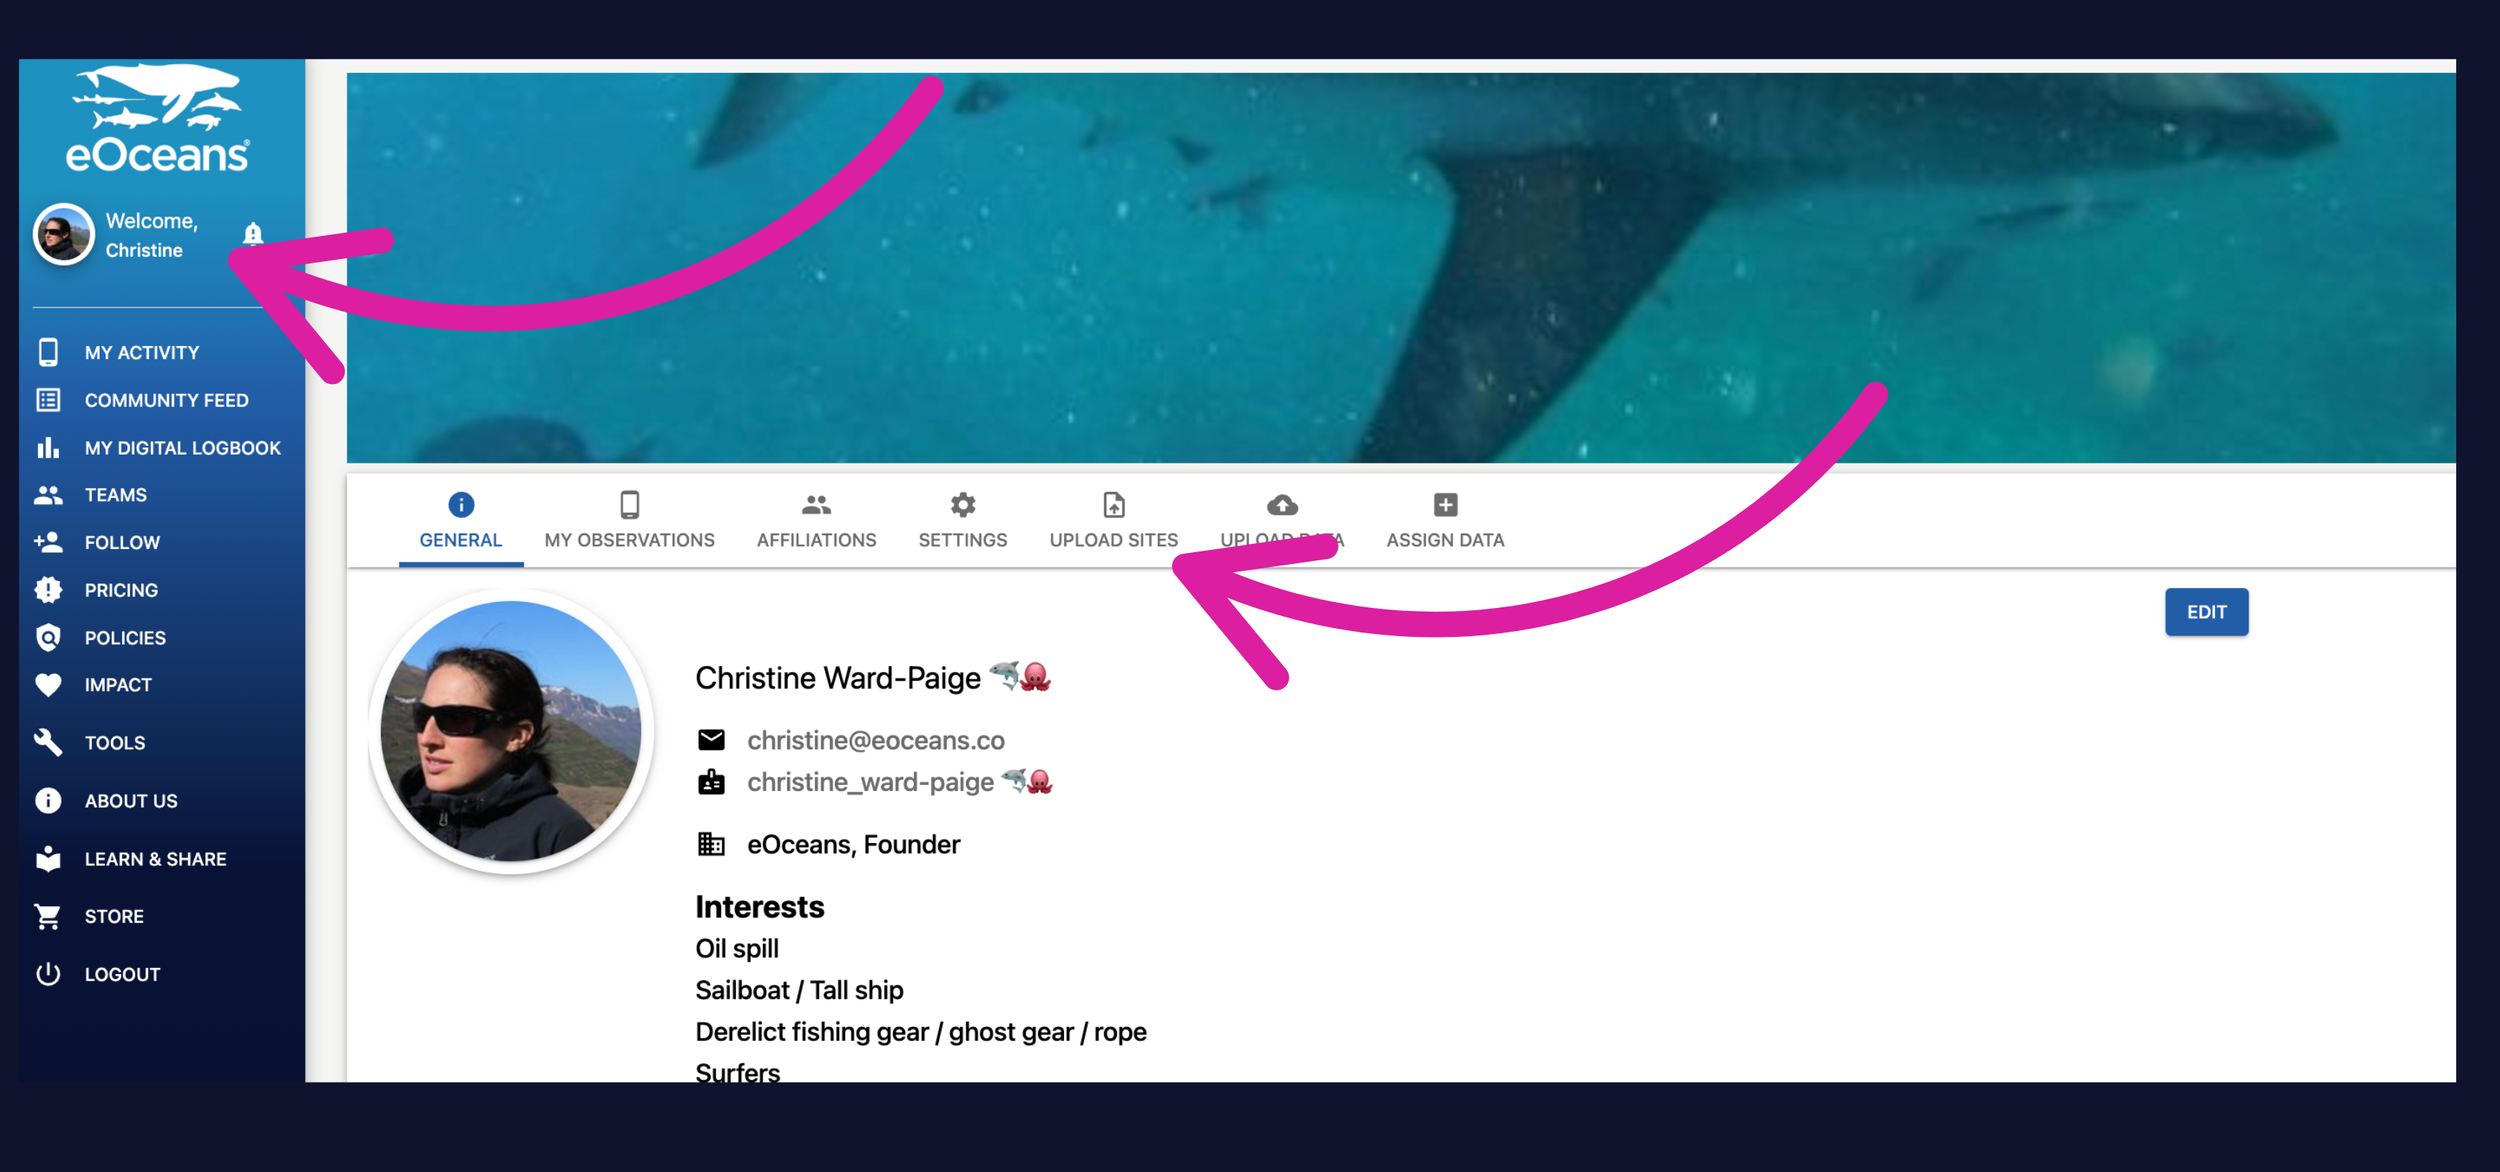
Then, once you are logged into the dashboard —
Navigate to your profile, then ‘UPLOAD SITES’ tab.
*NOTE: Your profile may have different options, depending on what tools you have enabled.
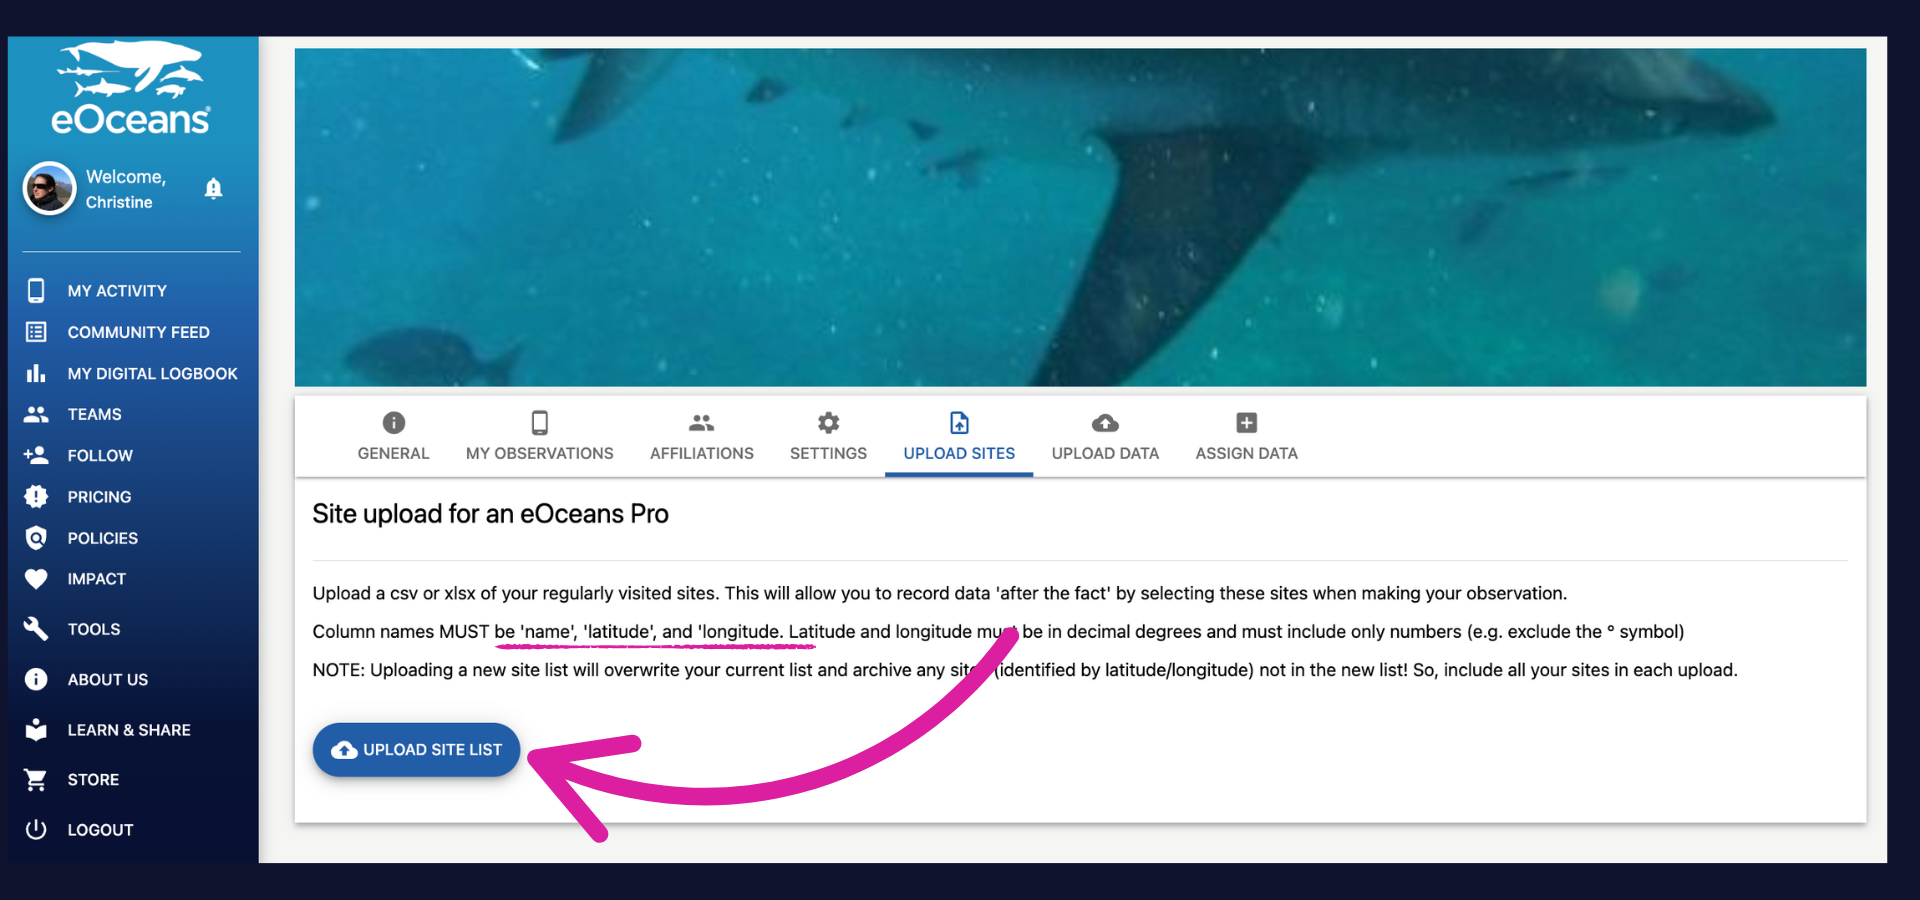
Upload site list —
Upload the csv or xlsx version of the site list.
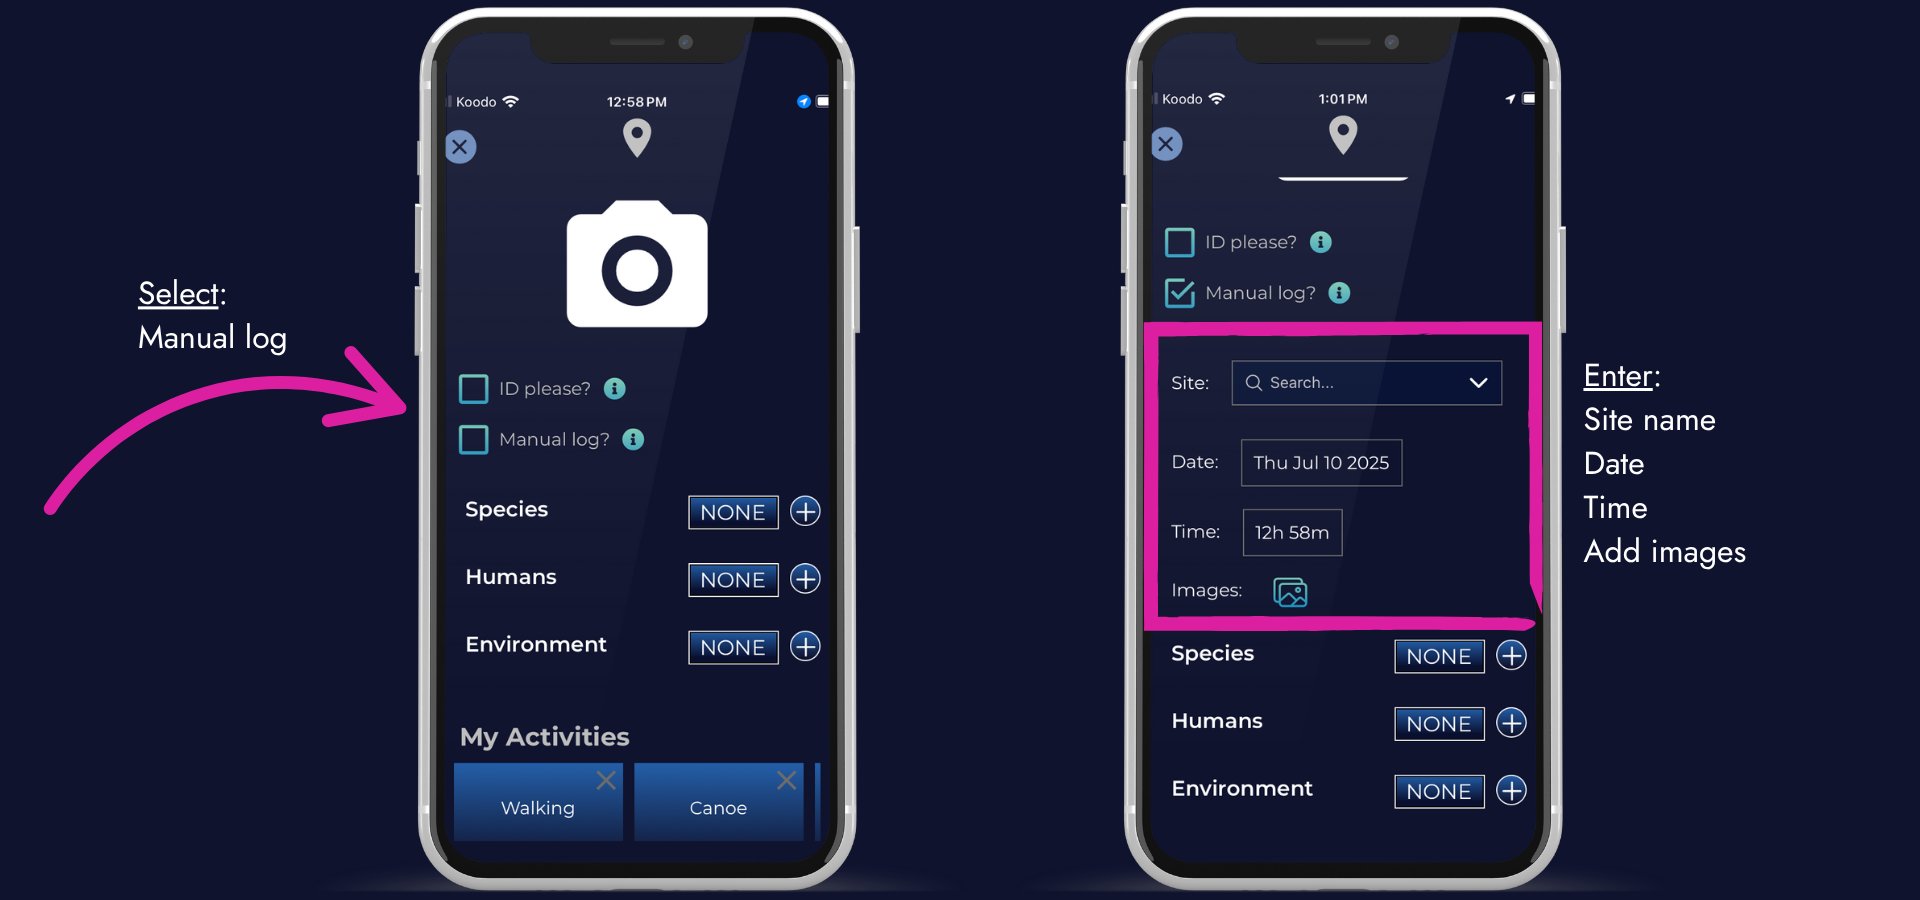
Start logging —
Go out and do your samples, record observations on paper, slates, or other recording device.
Then, when you’re ready, launch the MOBILE APP, click the ‘+’ to add a new observation, wait a few seconds and “Manual log?’ will appear below the camera icon. Once you select this option, you can enter the date, time, and select a site for the observation.
NOTE: This is an ONLINE only feature.
Having trouble? Our team is here to help.
Contact us or visit our how-to page for more information on using eOceans.